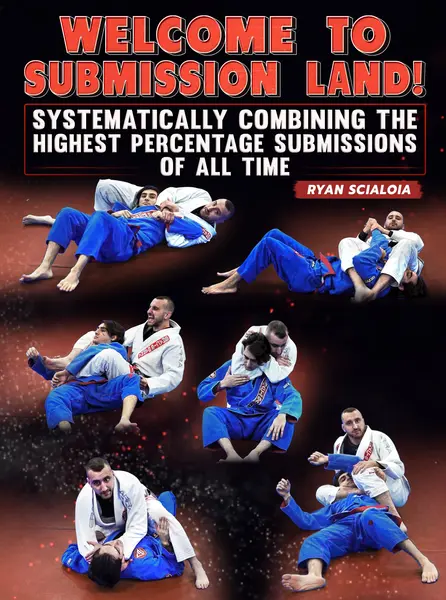
Brazilian Jiu Jitsu Black Belt Ryan Scialoia Shows You How To Chain Together The 6 Highest Percentage Submissions, Giving You A Reliable Roadmap To Submission Success!
<!-- split -->
$127
Course content · 7 volumes · 192 chapters
1
Volume 1
- 1. Introduction
- 2. Introduction
- 3. How to best use this video
- 4. Rear Naked Strangle
- 5. Sliding Collar Strangle
- 6. Triangle
- 7. Arm-Bar
- 8. Kimura
- 9. Ezekiel
- 10. Fight begins and ends with the hands
- 11. Spinal Alignment/Misalignment
- 12. Diagonal Control
- 13. Perpendicular Control
- 14. Zero Sum Game
- 15. Head Trap
- 16. The elbow as a critical line of demarcation
- 17. Diagonal Control from the Back/Straight Jacket
- 18. The Critical Bridge between the 3rd and 4th Phase of BJJ
- 19. Chair Sitting
- 20. S Mounts
- 21. Part 2 of Submission Land The Twister Hook and Pathways to the back
2
Volume 2
- 1. Rear Naked Strangle Series
- 2. Variation #1 Perfect Rear Naked Strangle
- 3. Variation #2 One Arm Strangle
- 4. Variation #3 Mandible Strangle
- 5. Variation #4 Palm To Palm RNS
- 6. Variation #5 Short Choke
- 7. 4 Scenarios of The Back
- 8. Scenario #1 Face down Rickson Style
- 9. Scenario #1 Face down Double Unders
- 10. Scenario #2 Face up (Hooks/Crab Ride)
- 11. Scenario #2 Face up Chair Sitting
- 12. Scenario #3 Underhook Side (Uncontested Strangle Arm)
- 13. Trapping an Arm
- 14. Hand Fighting Strategy #1 Problems Solved
- 15. Hand Fighting Strategy #2 Pass off Method
- 16. Hand Fighting Strategy #3 Throw away Method
- 17. Hand Fighting Strategy #4 Straight Grips
- 18. Scenario #4 Strangle Side (Strong Side)
- 19. Hand Fighting Strategy #1 Problems Solved
- 20. Hand Fighting Strategy #2 Mandible Strangle
- 21. Hand Fighting Strategy #3 Old School Hand Gripping
- 22. Hand Fighting Strategy #4 Armpit grip
- 23. Hand Fighting Strategy #5 Marcelo Garcia Style
- 24. Hand Fighting Strategy #6 2 Minutes
- 25. Hand Fighting Strategy #7 Incorrect RNS
- 26. Hand Fighting Strategy #8 Turning
- 27. Hand Fighting Strategy #9 Arm Trap Strong Side
- 28. Hand Fighting Strategy #10 Pull Back
- 29. Entries Into RNS
- 30. Mount Entry #1 Reactive Smount Drill
- 31. Mount Entry #2 Provoking Reactive Smount Elbow Exposure
- 32. Mount Entry #3 Proactive Arm Ratchet
- 33. Mount Entry #4 Proactive Double arm Ratchet
- 34. Side Control Entry #1 Crossface Armpit
- 35. Side Control Entry #2 Reverse Crossface
- 36. Side Control Entry #3 Underhook Reactive
- 37. Side Control Entry #4 Americana Dilemma
- 38. Kesagatame Entry Arm Ratchet
- 39. Knee On Belly Entry #1 Underhook Spin
- 40. Knee On Belly Entry #2 Near Side/Far Side
- 41. Knee On Belly Entry #3 Turtle > Backtake
- 42. North South Entry #1 Double Gift Wrap Dilemma
- 43. North South Entry #2 Chest Compression Submission Dilemma
- 44. Turtle Arm Trap Entry/Crucifix Study
3
Volume 3
- 1. Introduction to Sliding Collar Strangle
- 2. Variation #1 Double Lapel
- 3. Variation #2 Bo and Arrow
- 4. Variation #3 Half Nelson/Hand Hold
- 5. Variation #4 Using the Legs
- 6. Variation #5 Clock Strangle
- 7. Differences Between RNS and Sliding Collar Strangle
- 8. Underhook Side Strategy #1
- 9. Underhook Side Strategy #2 Major Overlap
- 10. Strangle Side Strategy #1 Hook Lift
- 11. Strangle Side Strategy #2 Proactive Chair Sit
- 12. Strangle Hand Entry From Turtle - Finishing Upside Down
- 13. Clock Choke
- 14. Armbar Dilemma
- 15. Triangle Dilemma (Plus Bonus Kimura)
- 16. Back Ezekiel Dilemma
- 17. RNS Dilemma
- 18. Support Hand Entries #1 Turtle
- 19. Support Hand Entries #2 Leg drag
- 20. Support Hand Entries #3 Torreando
- 21. Support Hand Entries #4 Longstep
4
Volume 4
- 1. Triangle Introduction
- 2. Variation #1 Finishing Mechanics Of Back Triangle
- 3. Joint Locks Within Back Triangle
- 4. Variation #2 Finishing Mechanics of Front Triangle
- 5. Evolution Of the Front Triangle
- 6. Joint Locks Within the Front Triangle
- 7. Variation #3 Opposite side Triangle
- 8. Joint Locks Within the Opposite Side Triangle
- 9. Putting it all Together
- 10. Back Triangle Entry #1 Arm Trap Overlap
- 11. Back Triangle Entry #2 Kimura Trap Overlap
- 12. Back Triangle Entry #3 RNS Gift Wrap Entry Overlap
- 13. Back Triangle Entry #4 Chair Sitting
- 14. Back Triangle Entry #5 Defended Armbar
- 15. Back Triangle Entry #6 Crucifix
- 16. Entries Into Front Triangle - Front Triangle Entry #1 Side Control Dilemma
- 17. Front Triangle Entry #2 Mounted Triangle Dilemma (With Bonus)
- 18. Front Triangle Entry #3 Armbar Into Ankle Triangle
- 19. Opposite side triangle Entry 1 Reverse S mount Study
5
Volume 5
- 1. Armbar Introduction
- 2. Armbar Variation #1 Crossed Feet
- 3. Armbar Variation #2 Bodyweight / Armbar Smount
- 4. Armbar Variation #3 Caio Terra Variation
- 5. Armbar Variation #4 Triangled Legs
- 6. Armbar Variation #5 1/4 Juji
- 7. Armbar Variation #6 Monoplata/Spiral Armlock
- 8. Handfighting Strategies #1 Tom Murphy/Rickson
- 9. Handfighting Strategies #2 Leaning Towards the Head
- 10. Handfighting Strategies #3 Secondary Arm Control
- 11. Handfighting Strategies #4 Total Relaxation
- 12. Handfighting Strategies #5 Tension
- 13. Handfighting Strategies #6 Using your legs
- 14. Handfighting Strategy #7 Locked Hands Dilemma
- 15. Armbar Transitions Upside down To Right side up
- 16. Countering A Stack
- 17. Switching Armbar S Mounts
- 18. Armbar and the Back/Submission Land
- 19. Sit Down Son
- 20. Mount Armbar Entry #1 Classic Double Attack
- 21. Mount Armbar Entry #2 Ezekiel Dilemma
- 22. Mount Armbar Entry #3 Triangle Double Attack
- 23. Mount Armbar Entry #4 Americana Double Attack 1
- 24. Mount Armbar Entry #5 Americana Double Attack 2
- 25. Mount Armbar Entry #6 Arm Ratchet
- 26. Mount Armbar Entry #7 Hands On Head
- 27. Mount Armbar Entry #8 Standard Armbar
- 28. Mount Armbar Entry #9 Hands Around The Back Armbar
- 29. Mount Armbar Entry #10 1 Hand Shirt/Gi Grab Armbar
- 30. Mount Armbar Entry #11 Mummy Armbar
- 31. Mount Armbar Entry #12 Spinning Underhook Armbar
- 32. Back Armbar Entry #1 RNS Overlap
- 33. Back Armbar Entry #2 Chair Sit S mount Armbar
- 34. Back Armbar Entry #3 Purgatory Armbar
- 35. Back Armbar Entry #4 Bo and Arrow Armbar 1,2
- 36. Back Armbar Entry #5 Reverse Top Lock
- 37. Side Control Armbar Entry #1 Kesagatame
- 38. Side Control Armbar Entry #2 Kesagatame to 1/4 Juji
- 39. Side Control Armbar Entry #3 Triangle/Smount Dilemma
- 40. Side Control Armbar Entry #4 Kesa - Backstep
- 41. Side Control Armbar Entry #5 Papercutter Strangle Dilemma
- 42. Knee On Belly Armbar Entry #1 Shotgun armbar
- 43. Knee On Belly Armbar Entry #2 Far Side Spinning
- 44. Knee On Belly Armbar Entry #3 Reverse Knee On Belly Switch
- 45. Trilemma Armbar From Bottom
6
Volume 6
- 1. Kimura Introduction
- 2. Variation #1 Pull vs Push Dominant Finish
- 3. Grip Breaks
- 4. Variation #2 Breaking the Forearm
- 5. Variation #3 One Handed Finish
- 6. 3 Directions of the Kimura
- 7. T Kimura/Perpendicular Control
- 8. T Kimura to 1/4 Juji
- 9. T Kimura to Kimura
- 10. T Kimura to the Back/Submission land
- 11. T Kimura to the Crucifix Overlap
- 12. T Kimura to the Back Triangle
- 13. T Kimura to Guard
- 14. Kimura Entry #1 Body Lock
- 15. Kimura Entry #2 Single Leg Head Inside
- 16. Kimura Entry #3 Single leg Head Outside
- 17. Kimura Entry #4 Single Leg from the Knees
- 18. Kimura Entry #5 Double Leg Defense
- 19. Kimura Entry #6 Rolling over the Guard
- 20. Kimura Entry #7 1 Handed Half guard Kimura
- 21. Kimura Entry #8 Side Control Bottom
- 22. Kimura Entry #9 Kimura Counter
- 23. Kimura Entry #10 Hot Dog Roll Kimura
- 24. Kimura Entry #11 Kimura Sweep Closed guard
- 25. Kimura Entry #12 Palm Up or Palm Down
- 26. Kimura Entry #13 Kimura Dilemma From North South
- 27. Kimura Entry #14 Kimura from Reverse Kesagatame
- 28. Kimura Entry #15 Kimura from opponents underhook
- 29. Kimura Entry #16 Kimura Within Your Underhook
- 30. Kimura Entry #17 Kimura from Butterfly Half Guard
7
Volume 7
- 1. Ezekiel Introduction
- 2. Back Ezekiel Entry #1 S Mount (Arm In)
- 3. Back Ezekiel Entry #2 Collar Strangle Ezekiel Connection
- 4. Back Ezekiel Entry #3 Head and Arm Ezekiel Dilemma
- 5. Back Ezekiel Entry #4 Arm Ratchet Method
- 6. Back Ezekiel Entry #5 Rear Naked Strangle Entries Overlap
- 7. Back Ezekiel Entry #6 Using The Claw Grip
- 8. Back Ezekiel Entry #7 Leg Drag/Cross collar Support Hand Entry Overlap
- 9. Front Ezekiel (Arm Out) Entry #1 Classic
- 10. Front Ezekiel Entry #2 Arm in Vs Arm Out Dilemma
- 11. Front Ezekiel Entry #3 Elbow escape Ezekiel Dilemma
- 12. Front Ezekiel Entry #4 Position/Submission Dilemma
Linked to
More Instructionals
View all
$127.00