Instructionals
Featured
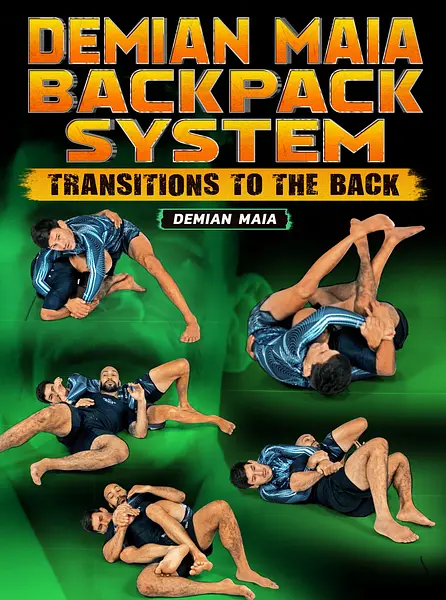
The Maia Backpack System: Transitions To The Back by Demian Maia
by Demian Maia
$197.00
Get To The Back With Battle-Tested Technique From MMA’s Greatest Back Attacker Demian Maia Shows His Entire System For Gaining Combat’s Most Dominant Position
- INTRO
- CONCEPTS OF TRANSITION TO THE BACK
- HOW THE COURSE IS DIVIDED
- PRINCIPLES OF TRANSITION
- PRINCIPLES OF DEFENDING THE BACK
- FROM "CEM-QUILOS" TO THE BACK - REACTING
- FROM "CEM-QUILOS" TO THE BACK - FORCING
- FROM "CEM-QUILOS" TO THE BACK - INDUCING
- TRANSITIONS TO THE BACK FROM THE TOP - FROM THE GUARD PASS
- PASSING THE BUTTERFLY GUARD INDUCING BACK EXPOSURE
- PASSING THE BUTTERFLY GUARD FORCING BACK EXPOSURE
- FROM HALF-MOUNT TO THE BACK
- FROM HALF-MOUNT TO THE BACK 2
- CHIN/TRICEPS CONTROL
- THE BOWLING MOVE
- VARIATION USING THE KNEE
- TRANSITIONS TO THE BACK FROM THE TOP - FROM THE MOUNT
- TRANSITIONS TO THE BACK FROM THE BOTTOM - HALF-GUARD
- VARIATION AGAINST STRONG OPPONENT
- VARIATION WHEN LEGS ARE AWAY
- VARIATION PULLING THE ARM
- HALF GUARD CROSSING ARMS
- ARM-DRAG
- AGAINST UNDER HOOK GUARD PASS
- AGAINST DOUBLE UNDER HOOK PASS
- FROM THE CLOSE GUARD
- TRANSITIONS TO THE BACK FROM STAND UP- AGAINST THE SINGLE LEG
- FROM THE UNDER HOOK
- DEFENDING THE BACK - LEG WORK IN DEPTH
- DEFENDING THE BACK - FALLING TO THE SIDE OF THE ATTACK ARM
- VARIATION BREAKING OPPONENT'S GRIP
- VARIATION ESCAPING FROM THE TOP HOOK
- DEFENDING THE BACK - TURTLE POSITION - TURTLE WITH NO HOOKS
- VARIATION WHEN OPPONENT TRY TO PUT THE HOOK
- TURTLE WITH ONE HOOK IN
- TURTLE WITH TWO HOOKS IN
- CONCLUSION
$197
Course content · 3 volumes · 39 chapters
1
Volume 1
- 1. Intro
- 2. Concepts Of Transition To The Back
- 3. How The Course Is Divided
- 4. Principles Of Transition
- 5. Principles Of Defending The Back
- 6. Principles Of Defending The Back - From “Cem-Quilos” To The Back - Reacting
- 7. From “Cem-Quilos” To The Back - Forcing
- 8. From “Cem-Quilos” To The Back - Inducing
- 9. Transitions To The Back From The Top - From The Guard Pass
- 10. Passing The Butterfly Guard Inducing Back Exposure
- 11. Passing The Butterfly Guard Forcing Back Exposure
- 12. From Half-Mount To The Back
- 13. From Half-Mount To The Back 2
2
Volume 2
- 1. Countering half-guard sweep going to the back
- 2. Transitions To The Back From The Top - In Front Of The Opponent - Chin/Triceps Control
- 3. The Bowling Move
- 4. Variation Using The Knee
- 5. Transitions To The Back From The Top - From The Mount
- 6. Transitions To The Back From The Bottom - Half-Guard
- 7. Variation Against Strong Opponent
- 8. Variation When Legs Are Away
- 9. Variation Pulling The Arm
- 10. Half Guard Crossing Arms
- 11. Transitions To The Back From The Bottom – Guard - Arm-Drag
- 12. Against Under Hook Guard Pass
- 13. Against Double Under Hook Pass
- 14. From The Close Guard
- 15. Transitions To The Back From Stand Up- Against The Single Leg
- 16. From The Under Hook
3
Volume 3
- 1. Defending The Back - Belly Up
- 2. Defending The Back - Leg Work In Depth
- 3. Defending The Back - Falling To The Side Of The Attack Arm
- 4. Variation Breaking Opponent’S Grip
- 5. Variation Escaping from the Top Hook
- 6. Defending The Back - Turtle Position - Turtle With No Hooks
- 7. Variation When Opponent Try To Put The Hook
- 8. Turtle With One Hook In
- 9. Turtle With Two Hooks In
- 10. Conclusion
Linked to
Taught by


More Instructionals
View all
$197.00