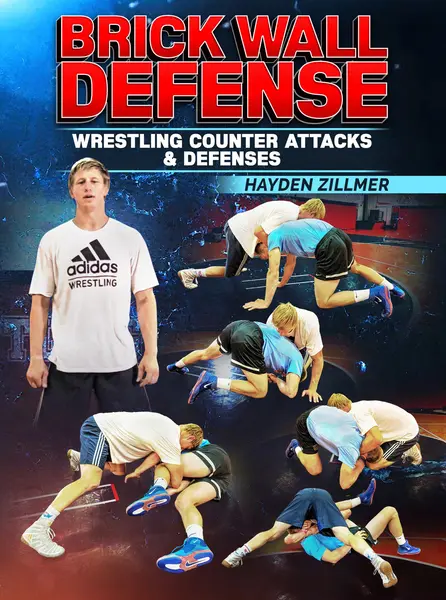
Stop Your Opponent's Shots With These Counter Wrestling Techniques From All-American Hayden Zillmer
<!-- split -->
Stop Your Opponent's Shots With These Counter Wrestling Techniques From All-American Hayden Zillmer
- Intro
- Counter Attacking and Front Headlock Offense
- Head/Hands: Flagging to Go-Behind
- Head/Hands: Dragging to Go-Behind
- Outside Step to Leg Re-Attack
- Front Headlock Positioning - Getting Behind The Elbows
- Front Headlock Positioning - Switch Directions/Getting Behind the Elbows
- Front Headlock Positioning - Hand to the Chin
- Front Headlock Positioning - Drag
- Front Headlock Positioning - Head In The Hole
- Front Headlock Positioning - Near Side Cradle
- Front Headlock Positioning - Throw By
- Front Headlock Positioning - Near Side Switch to Other Side
- Front Headlock Positioning - Cow Catcher
- Front Headlock Positioning - Elbow Caught, Change Over
- Front Headlock Positioning - Elbow Caught, Knee Tap
- Front Headlock Positioning - Elbow Caught, Start The Chainsaw
- Front Headlock Positioning - Elbow Caught
- Single Leg Defense
- Baseline
- Throw The Head Outside
- When Man Keeps Hands Locked
- Whizzer and Step Over Top
- Whizzer and Get Hand Below Knee, Grab Ankle
- Whizzer Baseline
- Whizzer, High Leg Over - Cradle
- Whizzer, High Leg Over - Wrestle Through It
- Leg In the Air
- Leg In The Air, Rubber Knee
- Whizzer to the Mat
- High Up On The Leg
- High Crotch Defense
- High Crotch Defense - Baseline
- High Crotch Defense - Throw The Head Inside
- High Crotch Defense - Sit The Corner
- High Crotch Defense - Crotch Lock
- High Crotch Defense - Beat The Shoulder, Attack The Leg
- Crackdown Defense - Weight To Head
- Crackdown Defense - Chest Lock
- Crackdown Defense - Beat Shoulder, Sit Corner
- Low Single Defense
- Knee In The Shoulder
- Sit The Corner
- Kickout
- Low Single Defense - Fall Off The Side
-
Crackdown Offense
- Running Under The Leg Finish
- Getting The Arm Across
- Table The Leg
- Attack Nearside Cradle
- Far Ankle
- Back Elbow Stack Position
- Back Elbow Pop The Head
- Shot Recovery Series
- Single Leg Shot Recovery Basics
- Single Leg Shot Recover: Throw-By
- Single Leg Shot Recover: Body Lock
- Single Leg Shot Recovery: Run Down Pick
- Single Leg Shot Recovery: Front Headlock
- Single Leg Shot Recovery: Duck Under
- Front Headlock Shot Recovery: Attacking Hand
- Front Headlock Shot Recovery: Sucker Drag
- Front Headlock Shot Recovery: Peak Out
$77
Course content · 4 volumes · 59 chapters
1
Volume 1
- 1. Intro
- 2. Counter Attacking and Front Headlock Offense. Head/Hands: Flagging to Go-Behind
- 3. Head/Hands: Dragging to Go-Behind
- 4. Outside Step to Leg Re-Attack
- 5. Front Headlock Positioning - Getting Behind the Elbows
- 6. Front Headlock Positioning - Switch Directions/Getting Behind the Elbows
- 7. Front Headlock Positioning - Hand to the Chin
- 8. Front Headlock Positioning - Drag
- 9. Front Headlock Positioning - Head in the Hole
- 10. Front Headlock Positioning - Near Side Cradle
- 11. Front Headlock Positioning - Throw-By
- 12. Front Headlock Positioning - Near Side switch to Other Side
- 13. Front Headlock Positioning - Cow Catcher
- 14. Front Headlock Positioning - Elbow Caught, Change Over
- 15. Front Headlock Positioning - Elbow Caught, Knee Tap
- 16. Front Headlock Positioning - Elbow Caught, Start the Chainsaw
- 17. Front Headlock Positioning - Elbow Caught
2
Volume 2
- 1. Single Leg Defense. Single Leg Defense - Baseline
- 2. Single Leg Defense - Throw the Head Outside
- 3. Single Leg Defense - When Man Keeps Hands Locked
- 4. Single Leg Defense - Whizzer and Step Over Top
- 5. Single Leg Defense - Whizzer and Get Hand Below Knee, Grab Ankle
- 6. Single Leg Defense - Whizzer Baseline
- 7. Single Leg Defense - Whizzer, High Leg Over - Cradle
- 8. Single Leg Defense - Whizzer, High Leg Over - Wrestle Through It
- 9. Single Leg Defense - Leg in the Air
- 10. Single Leg Defense - Leg in the Air, Rubber Knee
- 11. Single Leg Defense - Whizzer to the Mat
- 12. Single Leg Defense - High up on the Leg
3
Volume 3
- 1. High Crotch Defense. High Crotch Defense - Baseline
- 2. High Crotch Defense - Throw the Head Inside
- 3. High Crotch Defense - Sit the Corner
- 4. High Crotch Defense - Crotch Lock
- 5. High Crotch Defense - Beat the Shoulder, Attack the Leg
- 6. Crackdown Defense - Weight to Head
- 7. Crackdown Defense - Chest Lock
- 8. Crackdown Defense - Beat Shoulder, Sit Corner
- 9. Low Single Defense. Low Single Defense - Knee in the Shoulder
- 10. Low Single Defense - Sit the Corner
- 11. Low Single Defense - Kickout
- 12. Low Single Defense - Fall Off the Side
4
Volume 4
- 1. Crackdown Offense. Running Under the Leg Finish
- 2. Getting the Arm Across
- 3. Table the Leg
- 4. Attack Nearside Cradle
- 5. Far Ankle
- 6. Back Elbow Stack Position
- 7. Back Elbow Pop the Head
- 8. Shot Recovery Series. Single Leg Shot Recovery Basics
- 9. Single Leg Shot Recovery: Throw-By
- 10. Single Leg Shot Recovery: Body Lock
- 11. Single Leg Shot Recovery: Run Down Pick
- 12. Single Leg Shot Recovery: Front Headlock
- 13. Single Leg Shot Recovery: Duck Under
- 14. Front Headlock Shot Recovery: Control Elbow and Circle
- 15. Front Headlock Shot Recovery: Attacking Hand
- 16. Front Headlock Shot Recovery: Sucker Drag
- 17. Front Headlock Shot Recovery: Peak Our
- 18. Outro
Linked to
More Instructionals
View all
$79.00