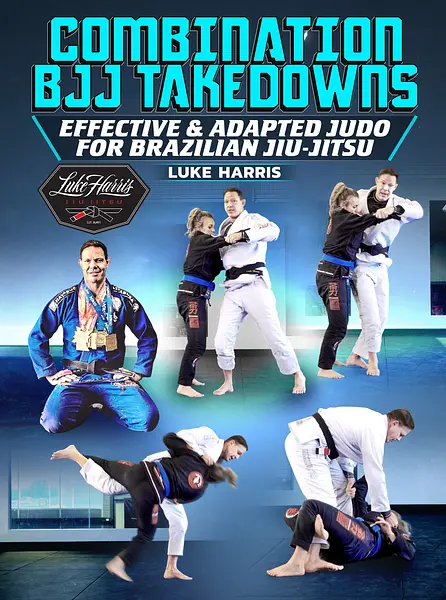
Learn Battle Tested Takedown Sequences that BJJ Black Belt Luke Harris Used to Become an IBJJF World Champion!
- Luke Harris is an accomplished BJJ Black Belt under Robert Drysdale and the owner and head instructor at the Hayabusa Training Center in Alberta, Canada
- Harris is a heavily decorated competitor, with IBJJF World No-Gi Gold to his credit, not to mention an impressive MMA record, and the honor of coaching and cornering multiple high level fighters in the UFC
- Master the most effective takedowns that offer a direct path to victory with perfectly paired submissions
- This course will provide critical information for beginners and advanced competitors alike and will help you improve your overall game
MEET YOUR INSTRUCTOR
ENTRIES AND SET UPS TO UCHIMATA
UCHIMATA TO COUNTER A SINGLE LEG
UCHIMATA TO COUNTER A BODY LOCK
UCHIMATA TO KNEE BAR SEQUENCE
UCHIMATA TO HALF GUARD TO KNEE CUT TO BACK STEP TO KNEE BAR TO TOE HOLD TO KNEE BAR
RECAP
ENTRIES AND SET UPS TO DROP SEOI
DROP IPPON SEOI NAGE TO OMOPLATA SEQUENCE
DROP SEOI TO ARM BAR TO ARM BAR ESCAPE TO OMOPLATA FINISH STANDING
ANOTHER OPTION IS WHEN THEY STAND WITH OMOPLATA, LEG WRAP TO 50/50 SWEEP TO FOOT LOCK
RECAP
KATA-GURUMA TO TRIANGLE SEQUENCE
KATA-GURUMA TO STEP OVER TRIANGLE TO ESCAPE BY PUSHING LEG OVER THE HEAD TO ARMBAR TO TRIANGLE
RECAP
ENTRIES AND SET UPS TO SUMI-GAESHI
SUMI-GAESHI TO COUNTER A SINGLE LEG ATTACK
SUMI GAESHI WITH GI GRIP TO CRUCIFIX SEQUENCE
CRUCIFIX TO REVERSE OMOPLATA
CRUCIFIX TO 1-ARM CROSS LAPEL CHOKE TO TRIANGLE TO KIMURA
RECAP
ENTRIES AND SET UPS TO YOKO-TOMOE-NAGE
TOMOE-NAGE TO REVERSE TRIANGLE SEQUENCE
TOMOE-NAGE TO TRIPOD SWEEP TO SINGLE X TO STRAIGHT ANKLE LOCK
TOMOE-NAGE TO DLR HOOK TO ARMBAR
RECAP
OSOTO-GARI TO COUNTER A SINGLE LEG ATTACK TO KIMURA AND SHOULDER ROLL SEQUENCE
OSOTO-GARI SEQUENCE TO NECK SCISSORS TO REVERSE TRIANGLE TO KIMURA
RECAP
SASAE TO BOW & ARROW
SASAE TO CLOCK CHOKE
SASAE TO CLOCK CHOKE TO BOW & ARROW TO ARMBAR SEQUENCE
RECAP
TE-GURUMA TO COUNTER UCHIMATA
TE-GURUMA TO MOUNT TO X-CHOKE TO KEYLOCK TO HEAT & ARM SEQUENCE
RECAP
CONCLUSION
$79
Course content · 4 volumes · 47 chapters
1
Volume 1
- 1. Introduction
- 2. Meet Your Instructor
- 3. Uchimata (Inner Thigh Throw)
- 4. Entries And Set Ups To Uchimata
- 5. Uchimata To Counter A Single Leg
- 6. Uchimata To Counter A Body Lock
- 7. Uchimata To Knee Bar Sequence
- 8. Uchimata To Half Guard To Knee Cut To Back Step To Knee Bar To Toe Hold To Knee Bar
- 9. Recap
- 10. Drop Ippon-seoi-nage (One-arm Shoulder Throw)
- 11. Entries And Set Ups To Drop Seoi
- 12. Drop Ippon Seoi Nage to Omoplata Sequence
- 13. Drop Seoi To Arm Bar To Arm Bar Escape To Omoplata Finish Standing
- 14. Another Option Is When They Stand With Omoplata, Leg Wrap To 50/50 Sweep To Foot Lock
- 15. Recap
2
Volume 2
- 1. Kata-guruma (Firemans Carry)
- 2. Kata-guruma To Triangle Sequence
- 3. Kata-guruma To Step Over Triangle To Escape By Pushing Leg Over The Head To Armbar To Triangle
- 4. Recap
- 5. Sumi-gaeshi (Corner Throw)
- 6. Entries And Set Ups To Sumi-gaeshi
- 7. Sumi-gaeshi To Counter A Single Leg Attack
- 8. Sumi Gaeshi With Gi Grip To Crucifix Sequence
- 9. Crucifix To Reverse Omoplata
- 10. Crucifix To 1-arm Cross Lapel Choke To Triangle To Kimura
- 11. Recap
3
Volume 3
- 1. Tomoe-nage (Stomach Throw)
- 2. Entries And Set Ups To Yoko-tomoe-nage
- 3. Tomoe-nage To Reverse Triangle Sequence
- 4. Tomoe-nage To Tripod Sweep To Single X To Straight Ankle Lock
- 5. Tomoe-nage To DLR Hook To Armbar
- 6. Recap
- 7. Osoto-gari (Major Outer Reaping)
- 8. Osoto-gari To Counter A Single Leg Attack To Kimura And Shoulder Roll Sequence
- 9. Osoto-gari Sequence To Neck Scissors To Reverse Triangle To Kimura
- 10. Recap
4
Volume 4
- 1. Sasae-tsurikomi-ashi (Supporting Foot Lift-pull Throw)
- 2. Sasae To Bow & Arrow
- 3. Sasae To Clock Choke
- 4. Sasae To Clock Choke To Bow & Arrow To Armbar Sequence
- 5. Recap
- 6. Te-guruma (Hand Wheel)
- 7. Te-guruma To Counter Uchimata
- 8. Te-guruma To Mount To X-choke To Keylock To Head & Arm Sequence
- 9. Recap
- 10. Bonus: Tai-otoshi (Body Drop)
- 11. Conclusion
Linked to
Taught by
More Instructionals
View all
$79.00