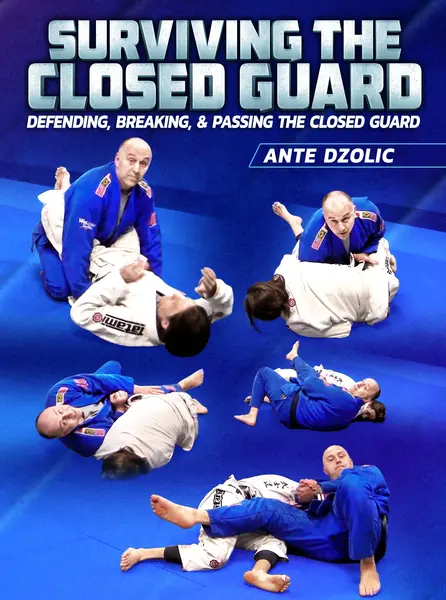
Survive the challenges that come while in the closed guard and counter with proper defense and submissions using technique from black belt Ante Dzolic!
- Look at tactics from the top and bottoms positions and become proficient in every possible scenario.
- Explore a multitude of sweep variations and understand the mechanics behind why they work so well.
- Understand the fundamentals of passing from closed guard to improve both your offense and your guard retention.
<!-- split -->
CONCLUSION
CONCLUSION
TRANSITIONING TO STANDING PASSES
CONCLUSION
$77
Course content · 4 volumes · 82 chapters
1
Volume 1
- 1. Submission Defense - Introduction
- 2. Safety Position
- 3. Grips, Posture and Base
- 4. Defending the Arm Triangle (Biceps Staple)
- 5. Defending the Arm Triangle (Dragged Arm Staple)
- 6. Defending the Cross Collar Choke (Fouling the Grip)
- 7. Defending the Cross Collar Choke (Answering the Phone)
- 8. Defending the Cross Collar Choke (Hug and Sprawl)
- 9. Defending the Guillotine Choke
- 10. Defending the Guillotine Choke (When Opponent is Much Bigger)
- 11. Defending the Guillotine Choke with a Counter-Submission
- 12. Defending the Arm in Guillotine Choke
- 13. Defending the Arm in Guillotine Choke (Worst Case Scenario)
- 14. Defending the Triangle Choke (Opening the Gate)
- 15. Defending the Triangle Choke (Technical Stand Up)
- 16. Defending the Triangle Choke (Making a Wall)
- 17. Defending the Kimura (Early Stage Defense)
- 18. Defending the Kimura (Early to Mid-Stage Defense)
- 19. Defending the Kimura (Late Stage Defense)
- 20. Defending the Straight Arm Bar
- 21. Defending the Omoplata
- 22. Conclusion
2
Volume 2
- 1. Defending Sweeps and Back Takes - Defending the Arm Drag (Getting Back to Safety Position)
- 2. Defending the Arm Drag (The Knee Cut Pass)
- 3. Defending the Arm Drag (Late Stage: Taking Away the Posts)
- 4. Defending the Sit Up Sweep (Back Take)
- 5. Defending the Sit Up Sweep (Modified Ezekiel Choke)
- 6. Defending the Sit Up Sweep (Safety Net)
- 7. Defending the Scissor Sweep (Arm Weave Pass I)
- 8. Defending the Scissor Sweep (Arm Weave Pass II)
- 9. Defending the Scissor Sweep (Safety Net: Attacking the Legs)
- 10. Defending the Pendulum Sweep (Early Recognition) Dropping the Elbow
- 11. Defending the Pendulum Sweep (Mission Impossible Sprawl)
- 12. Defending the Pendulum Sweep (Seatbelt Counter)
- 13. Defending the Flower Sweep (Early Recognition) Breaking Grips
- 14. Defending the Flower Sweep (Arm Sling with a Standing Pass)
- 15. Defending the Flower Sweep (Handcuff Pass from the Knees)
- 16. Defending the Double Ankle Pull Sweep (Jockey Squat and Sprawl)
- 17. Defending the Double Ankle Pull Sweep (Single Leg Stack Pass)
- 18. Defending the Double Ankle Pull Sweep (Grip Strip to Stack Pass)
- 19. Defending the Double Ankle Pull Sweep (Hip Thrust)
- 20. Defending the Server sweep (Knee On Belly to Stack Pass)
- 21. Defending the Server sweep (Countering the Omoplata Attack to Pass)
- 22. Defending the Server sweep (Dealing w/ the Cross Grip Omoplata Attack)
- 23. Conclusion
3
Volume 3
- 1. Passing From the Knees - Introduction
- 2. Posture and Grips
- 3. Three Routes to Pass
- 4. Twisting the spine
- 5. Passing from Broken Posture
- 6. Knee in Tailbone Break to the Single Stack Pass
- 7. Knee in Tailbone Break to the Bullfighter Pass
- 8. Knee in Tailbone Break to Passing the Spider Guard
- 9. The Bullfighter Pass to The Jockey Pass
- 10. Knee in Tailbone Break to The Over/Under Pass
- 11. The Extender Break
- 12. The Extender Break to Double Stack Pass
- 13. Knee Slide Break to Combat Base
- 14. Knee Slide Break to Back Step Pass
- 15. Combat Base to The Split Pass I
- 16. Combat Base to The Split Pass II
- 17. Combat Base to The Knee Cut Pass
- 18. Transitioning to Standing Passes
4
Volume 4
- 1. Passing Standing - Introduction
- 2. Two Stances
- 3. Simple Standup to Wide Squat Stance
- 4. Wide Squat Stance to Backstep Pass
- 5. Wide Squat Stance to the Stack Pass
- 6. Wide Squat Stance to the Knee Cut Pass
- 7. The J Break to Stack Pass
- 8. The J Break to Air Guitar Pass
- 9. The J Break Backup
- 10. The Chair Sit
- 11. Sumo Step to X Pass
- 12. Sumo Step to The Folding Pass I (Establishing Control)
- 13. Sumo Step to The Folding Pass II (Taking Mount)
- 14. Sumo Step to The Folding Pass III (Taking Side Control)
- 15. Sumo Step to The Folding Pass IV (Going to the Backside)
- 16. Sumo Step to The Knee Cut Pass
- 17. Sumo Step to The Stack Pass
- 18. Overcoming Cross Collar Grips
- 19. Conclusion
Linked to
More Instructionals
View all
$79.00