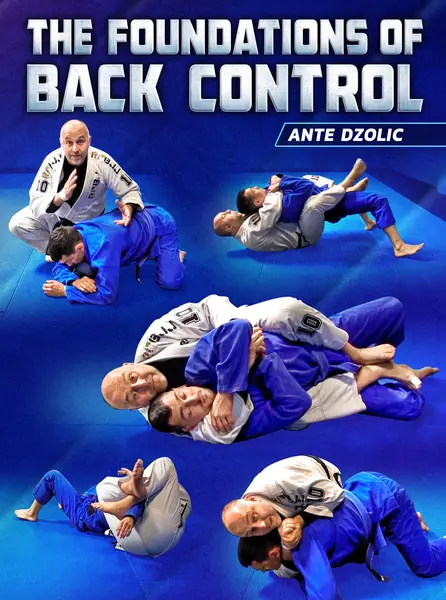
Build A Rock Solid Foundation For Controlling And Attacking The Back With Ante Dzolic!
<!-- split -->
$77
Course content · 6 volumes · 85 chapters
1
Volume 1
- 1. Series Introduction
- 2. The High Side Back Control - Introduction
- 3. The Simple Choke
- 4. The Simple Choke to RNC
- 5. The Simple Choke to the Three Big Chokes
- 6. The Simple Choke to Shin Behind the Neck Bow & Arrow
- 7. Advanced Simple Choke variations and Transition to the Under Hook Side Control
- 8. Hip Bump to Spread the Chicken
- 9. Spread the Chicken to Single Arm RNC & the Short Choke
- 10. Hip Bump to the Under Hook Side Back Control
- 11. Horse Collar Reset to Under Hook Side Control
- 12. Horse Collar Reset to High Side Back Control (Inserting the Bottom Hook)
- 13. Horse Collar Reset to High Side Back Control (Turtle Breakdown)
- 14. Power Half Nelson Breakdown
- 15. Horse Collar Control to the Upper Body Crucifix
2
Volume 2
- 1. The Under Hook Side Back Control - Introduction
- 2. Switching to the Under Hook Side
- 3. Opening Attack
- 4. Bow & Arrow Choke (Hand control variation)
- 5. Three Complimentary Chokes
- 6. Using the Modified Bow & Arrow to Counter a Hidden Topside Arm
- 7. Countering the Two on One Defense
- 8. Kimura Trap Back Control to Arm Bar
- 9. Sit Up to the Spiderweb
- 10. Switch Arm Bar VS RNC Defense
- 11. Regaining Back Control
- 12. The Uneven Hips Arm Bar
- 13. Follow Up Attacks When We Can’t Perform the Arm Bar
- 14. Countering a Strong Bridge
- 15. Transition to Spread the Chicken
- 16. Transition to the Lower Body Crucifix
- 17. Transition to Upper Body Crucifix
3
Volume 3
- 1. The Upper Body Crucifix - Introduction (Hooks or Harness)
- 2. Trapping the Near Side Arm
- 3. The Ugly RNC and Short Choke
- 4. Transition to Facing Upwards in the Crucifix
- 5. The Power Half Breakdown
- 6. Arm Bar with The Legs
- 7. The Sliding Collar Choke
- 8. Three Collar Chokes
- 9. The Single Arm RNC
- 10. The Hell Choke
- 11. Countering the Turn to the Legs Escape
- 12. Countering the Bridging Escape
- 13. Countering the Scoot Down and Back Shoulder Roll Escape
- 14. Failed Omo Plata to The Upper Body Crucifix
4
Volume 4
- 1. The Lower Body Crucifix - Introduction
- 2. The Pre Hook Entry
- 3. The Groin Stretch
- 4. The Calf Slicer
- 5. The Twister
- 6. Taking the Back
- 7. High Side Back Control to the Lower Body Crucifix
- 8. The Omo Plata to the Lower Body Crucifix
5
Volume 5
- 1. The Harness - Introduction
- 2. The Basic Harness (Cement Neck Brace)
- 3. The Basic Chair Sit (Pathway to the Under Hook Side Back Control)
- 4. Breaking Them Down to a Hip
- 5. The Basic Spiral Ride
- 6. Spiral Ride Variations and Transitions
- 7. The Switch (When the Crucifix Goes Wrong)
- 8. The Switch (to The Lower Body Crucifix)
- 9. Opening Attacks
- 10. The Modified Ezekiel Choke
- 11. The Clock Choke
- 12. Alternative Clock Choke
- 13. Faria Single Strap Breakdown
- 14. The Arm Triangle
- 15. The Modified Ezekiel (Again)
- 16. The Kimura
- 17. The Penetration Step Chair Sit
6
Volume 6
- 1. The Leg Harness - Introduction
- 2. Low Squat Entry to the Leg Harness
- 3. Chair Sit to the Leg Harness
- 4. High Side Back Control to the Leg Harness
- 5. Leg Harness Arm Bar
- 6. The Reverse Triangle Choke
- 7. Complimentary Armlock Attacks
- 8. The Biceps Slicer
- 9. Transition to Straight Arm Bar
- 10. Troubleshooting Common Arm and Grip Configurations
- 11. More Grip Breaking from Kimura Control
- 12. The Paper Cutter
- 13. Transition to the Upper Body Crucifix
- 14. Transition to the Under Hook Side Back Control
Linked to
More Instructionals
View all
$79.00