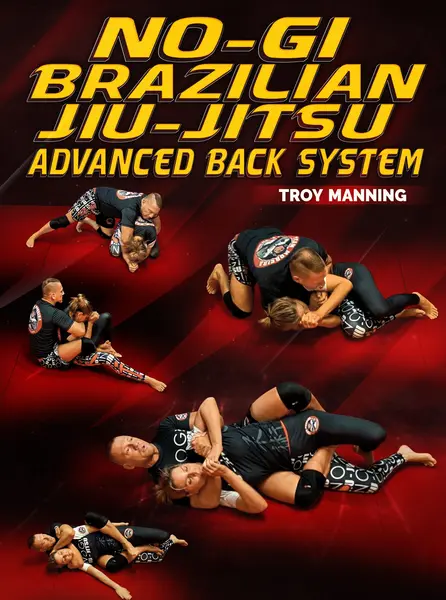
BJJ Black Belt And No-Gi Expert Instructor Troy Manning Details His Advanced Back System In This 4-Part Instructional!
- No Gi Jiu-Jitsu Academy and Cagefit Founder Troy Manning has helped thousands of students add incredible value to their BJJ games through the use of his wildly popular instructional materials
- Develop a complete system for BOTH attacking and defending from the back!
- Troy gets right to the action with every technique.
- Pinpoint the essentials for a wide range of back attack skills including submissions from the seatbelt, back control maintenance tips, back control variations, and MORE!
- Learn to funnel opponents into indefensible territory with an onslaught of submission chains.
- Build systematic escapes from the most common back attack tactics and work your way back on top!
- Troy covers everything you need to have a lights out back attack arsenal, as well as an iron clad system of escaping some of Jiu-Jitsu’s most powerful positions!
<!-- split -->
Check out a free sample:
So, What Exactly Do You Get?
PART 1
PART 2
PART 3
PART 4
$77
Course content · 4 volumes · 124 chapters
1
Volume 1
- 1. Intro
- 2. Seated Back Control
- 3. Overhook Side Escape To Re-Enter Into Back Control
- 4. Overhook Side Escape To Enter Into Body Lock
- 5. Overhook Side Escape To Enter Into Mount
- 6. Overhook Escape Counter To Seatbelt Chok, North-South Choke Or Kimura
- 7. Overhook Escape Counter To Re-Enter Hooks To Back Control
- 8. Seated Back Control Underhook Side Escape To Twister Control
- 9. Underhook Side Escape Counter To Re-Enter Into Back Control
- 10. Underhook Side Escape Counter To Twister Or Truck
- 11. Underhook Side Escape To Back Step Roll Into Truck Or Back-Take
- 12. Underhook Side Escape Counter To Tv Position And Into 4 Finishing Variations
- 13. Underhook Side Escape Counter To Seatbelt Choke, North-South Choke Or Kimura
- 14. Underhook Side Escape Counter If They Lean Forward Re-Enter Into Back-Control
- 15. Seated Back Control Stack Counter To Unstack And Re-Enter Into Back Control
- 16. Seated Back Control Stack Counter To Unstack Option 2
- 17. Seated Back Control Stack Counter To Twister Or Truck
- 18. Seated Back Stack Counter To Body Tee-Pee
- 19. Seated Back Control Arm-Over Counter Escape To Anaconda Or Guillotine
- 20. Seated Back Control Counter If They Put Arm Over And Turn Into You, To Guillotine
- 21. Seated Back Control Neck Crank Sweep, To 4 Finishing Variations
- 22. Seated Back Control Cranks
- 23. Seated Back Control Basic Rear-Naked Choke
- 24. Seated Back Control To Basic Armbar
- 25. Seated Back Control To Basic Triangle
- 26. Straight-Jacket Rear-Naked Choke
- 27. Straight-Jacket To Arm-Bar
- 28. Straight-Jacket To Triangle
2
Volume 2
- 1. Seated Back Control Arm Trap To Rear-Naked Choke
- 2. Seated Back Control Arm Trap To Armbar
- 3. Seated Back Control Arm Trap To Triangle
- 4. Seated Back Control To Arm-Head Choke
- 5. Seated Back Control To Arm-Head Choke, Backstep To 4/11
- 6. Seated Back Control Elbow Trap To Shoulder Submission
- 7. Seated Back Control Escape Scoot Down To Side Control
- 8. Seated Back Control Escape To Twister Control
- 9. Seated Back Control Escape Arm Over To Darce
- 10. Seated Back Control Escape Stack Turn To Guard
- 11. Seated Back Control Escape To Tv Position Escape To Darce
- 12. Seated Back Control Body Triangle Escape
- 13. Seated Back Control Feet-Crossed Or Rear-Naked Counters
- 14. Turtle Guard To Anaconda, 2 Variations
- 15. Turtle North-South Figure 4 Neck Crank With Anaconda Or Darce Option
- 16. Turtle To T-Darce
- 17. Turtle North-South Neck Crank Underhook Sweep
- 18. Turtle North-South Half Nelson Figure 4 Neck Crank
- 19. Turtle To Peruvian Neck-Tie
- 20. Turtle To Darce Choke
- 21. Turtle To Bulldog Choke
- 22. Turtle To Rolling Arm-Head Choke
- 23. Turtle To Crucifix Armbar & Choke, 2 Variations
- 24. Turtle To Crucifix Neck Crank
- 25. Turtle To Rolling Armbar
- 26. Turtle To Around The World Armbar
- 27. Turtle Hip-To-Hip, One Hook In To Truck
- 28. Turtle To Truck Without Hook
- 29. Turtle Tripod To Crucifix
- 30. Turtle Tripod To Crucifix Option 2
- 31. Turtle Tripod Counter Rolling Back-Take
- 32. Turtle Tripod Counter Inside Trip Or Take Away Base
- 33. Turtle To Bulldozer Sweep
- 34. Turtle To Sacrifice Roll
- 35. Turtle Hip-To-Hip, Block Hip Sweep
- 36. Turtle Hip-To-Hip, Insert Hook & Roll To Back-Take
- 37. Turtle Both Hooks In To Back-Take
- 38. Turtle, No Hooks To Back-Take With Options
- 39. Turtle Insert Knee To Back-Take With Counter Variations
3
Volume 3
- 1. Turtle Hip-To-Hip Escape, Trap & Roll Taking Back Counter
- 2. Turtle Hip-To-Hip, Bottom Escape To Back
- 3. Turtle Knee In Centre Drive Down To Twister Control
- 4. Turtle Hip-To-Hip Escape To Guard With 2 Submission Counters
- 5. Turtle Hip-To-Hip To Guard Option 2
- 6. Turtle North-South Escape To Back-Take
- 7. Turtle North-South Escape, Trap Arm, Switch Base To Side Control
- 8. Turtle North-South Escape, Single Leg To Side Control
- 9. Turtle North-South Escape To Half-Guard Back-Take Or Sacrifice Roll
- 10. Turtle, Hooks In, Flat Out To Rear-Naked Choke Or Crank
- 11. Turtle, Hooks In, Flatten Out To Armbar
- 12. Turtle, Hooks In To Rolling Armbar
- 13. Turtle, Hooks In To Rolling Armbar Option 2
- 14. Turtle, Hooks In Counter If They Pop-Up, Half Nelson Brake Base
- 15. Turtle, Hooks In, If They Pop-Up, Knee-Bar Submission
- 16. Turtle, Hooks In, Escape Pop-Up Out The Back
- 17. Turtle, Hooks In, Roll Escape To Side Control
- 18. Turtle, Hooks In With Double Underhooks Escape To North-South
- 19. Turtle, Hooks In Seatbelt Escape To Side Control
- 20. Standing Back-Take From Distance, High Crutch
- 21. Standing Back-Take From Arm-Drag
- 22. Standing Back-Take With Head Control, Flare Elbow To Take Back
- 23. Standing Back-Take From Mid-Range, Head Control To High Crutch
- 24. Standing Back-Take From Head Control To Arm-Drag
- 25. Standing, 2-On-1 Counter With Elbow Pull To Back-Take
- 26. Standing Underhook Control To High-Crutch Back-Take
- 27. Standing Double-Unders Back-Take
- 28. Standing 50/50, Arm-Drag To Back Control
- 29. Back Take-Down From Foot Lace
- 30. Back Take-Down, Failed Foot Lace To Rolling Back-Take
- 31. Back Take-Down From Hip Block
- 32. Back Take-Down From Sacrifice Throw
- 33. Back Take Down From Knee Bump Or Shoulder Grab
- 34. Back Take-Down From Sacrifice Throw Body Trip
- 35. Back Take-Down From 50/50
4
Volume 4
- 1. Stand Up Back Control Counter With 2-On-1 Hip Forward Escape
- 2. Standing Back Control Counter To Knee-Bar Or 4/11
- 3. Standing Back Control Counter To Step Behing Trip To Twister Control Or Throw
- 4. Standing Back Control Counter With Overhook Throw Or Ankle-Pick
- 5. Standing Back Control Counter With Kimura Or Throw
- 6. Side Control To Gift-Wrap To Back Take
- 7. Side Control To Cradle To Neck Crank
- 8. Side Control To Seatbelt To Neck Crank
- 9. Mount, Giftwrap To Back Take
- 10. High Mount Escape To Back Take Turtle Position
- 11. Butterfly, Arm-Drag To Back Take
- 12. Butterfly, Arm-Drag To Back Take Option 2
- 13. Butterfly, X-Guard To Back Take
- 14. Closed Guard, Gift-Wrap, Triangle / Back Take / Sweep To Back Take
- 15. Closed Guard, Arm-Drag To Arm-Head Choke Or Back Take
- 16. Half-Guard, Lock Down To Back Take
- 17. Z-Guard, Arm-Drag To Back Take
- 18. Z-Guard To Calf-Slice Or Rear-Naked
- 19. Z-Guard, Step Over To Calf-Slice Or Neck Crank / Rear-Naked
- 20. Half-Guard To Quarter-Guard, Back Take Or Truck
- 21. Dela-Riva Guard To Back Take
- 22. Reverse Dela-Riva Guard To Back Take
Linked to
More Instructionals
View all
$79.00