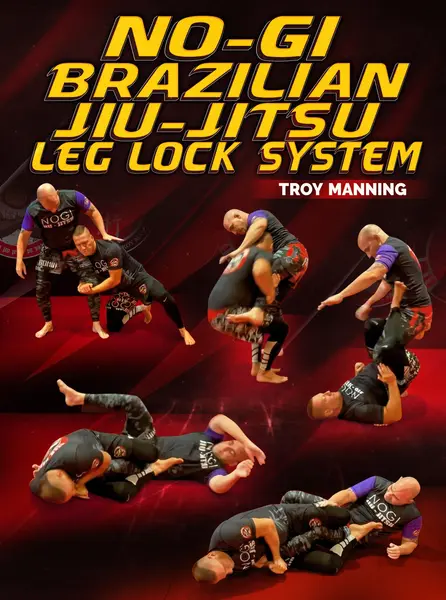
Wrap Up Your Opponent’s Leg To Control And Submit Them With Techniques & Drills Taught By 2nd-Degree BJJ Black Belt and Catch Wrestler Troy Manning!
<!-- split -->
$77
Course content · 4 volumes · 90 chapters
1
Volume 1
- 1. Intro
- 2. Common Positions Finishes And Escapes. Leg pummeling drill
- 3. Z lock entry option one
- 4. Z lock entry option two
- 5. Z lock escape
- 6. Leg pummeling to ashi garami finish with heel hook or straight foot lock
- 7. Ashi garami escape sit over foot to mount
- 8. Re - entry into leg lock if they sit over foot escape
- 9. Enter in to 4/11 if they sit over foot escape and go through 5 finishes from 4/11
- 10. Ashi entry if they escape then re-enter to other leg
- 11. Counter ashi position with toe hold
- 12. Counter ashi position with calf slice
- 13. Standing Ashi/ single x drill
- 14. Standing single x to heel hook or straight foot lock or belly down
- 15. Standing single x escape walk out
- 16. Standing single x escape to toe hold
- 17. Escape single x spin out to side control
- 18. Leg pummeling to cross Ashi to heel hook or straight foot lock
- 19. Cross Ashi escapes partner drill to re-enter
- 20. Cross Ashi smash escape
- 21. Cross Ashi hip out escape
- 22. Leg pummeling to 50/50 position to heel hook
- 23. 50/50 smash escape & hip out escape
- 24. Leg pummeling to 4/11 position with 5 submission finishes
- 25. 4/11 escape option one, two and three
- 26. Defending knee bar to face or side control or they do toe hold
2
Volume 2
- 1. Standing To Leg Entries. 50/50 heel hook entry from standing back position
- 2. Knee bar from standing
- 3. Single leg to calf slice
- 4. Counter single leg to 4/11
- 5. They counter your single leg then go to standing single x to straight foot lock or heel hook
- 6. They counter single leg then go to x guard to cross ashi
- 7. They counter your single leg then go to x guard sweep to ashi
- 8. They counter your single leg then go to x guard to 4/11 or calf slice
- 9. They counter your single leg then go to x guard to stacking 4/11 or z lock
- 10. Shin In Shin. Shin to shin to single x to heel hook or straight foot lock
- 11. Shin on shin to cross ashi heel hook or straight foot lock
- 12. Shin on shin to x guard to knee bar
- 13. Shin on shin to imanari roll
- 14. Shin on shin to x guard to back take then truck
3
Volume 3
- 1. Open guard. Standing to shin slice pass or back step to 4/11
- 2. Revers de la riva to figure four straight lock, knee bar or 4/11
- 3. Revers de la riva to back take or 4/11
- 4. Standing open guard pass to ashi heel hook or straight foot lock
- 5. Standing in open guard pass to ashi or straight foot lock option two
- 6. Standing open guard pass to knee bar or 4/11
- 7. De la riva to rolling toe hold
- 8. De la riva to rolling calf slice
- 9. Deep de la riva to knee bar or 4/11
- 10. Open guard pass to leg drag to ashi or 4/11
- 11. Open guard to leg drag to belly down heel hook
- 12. Open guard to leg drag to 4/11 option two
- 13. Open guard to leg drag to calf slice
- 14. Open guard to stack pass to 4/11 or z lock
- 15. Closed Guard. Foot on arm standing closed guard pass to heel hook or straight foot lock
- 16. Standing closed guard pass to leg stacking to 4/11 or z guard
- 17. Standing closed guard pass knee through centre pass to ashi or 4/11
- 18. Arm trap closed guard pass to ashi
- 19. Posture up pass to 4/11 or ashi options
- 20. Old school closed guard pass to ashi or calf slice or 4/11
- 21. Rubber Guard. Rubber guard to arm bar or heel hook
- 22. Rubber guard to omoplata to heel hook
4
Volume 4
- 1. Half Guard. Half guard pass to back step 4/11
- 2. Half guard to truck
- 3. Half guard to far leg knee bar or 4/11
- 4. Half guard same side knee bar
- 5. Z guard to toe hold
- 6. Z guard to heel hook or straight foot lock
- 7. Z guard bottom to knee bar
- 8. Half guard bottom to electric chair
- 9. Leg Lock Entries & Truck Entries & Escapes. Turtle to truck three entries
- 10. Side control to twister control to truck
- 11. Truck escape to re-truck
- 12. Truck escape to back take
- 13. Truck escape to arm bar
- 14. Truck escape using foot to hip out
- 15. Truck escape to back control option two
- 16. Truck escape to half guard
- 17. Side control to ashi or 4/11
- 18. Cradle to 4/11
- 19. Cradle to calf slice
- 20. Arm bar if they escape go to 4/11
- 21. Escape arm bar to knee bar or toe hold
- 22. Escape arm bar to 4/11
- 23. Butterfly Guard. Butterfly entry to x guard two options
- 24. Butterfly to x guard to calf slice
- 25. Butterfly guard to ashi
- 26. Butterfly guard two entries ti 4/11
- 27. Mount. Bottom of mount to ashi
- 28. Bottom of mount to x guard or inside leg control
Linked to
More Instructionals
View all
$79.00